


How to Tie Down a Tarp Properly
A tarp stays secure when the load is spread across reinforced attachment points, tension is applied in a balanced sequence, loose fabric is controlled, and rain has a clear drainage path. This guide explains how to secure a tarp with rope, bungees, straps, grommets and D-rings without concentrating all the force at one corner.
For trucks, construction, equipment, outdoor storage, shelters and custom industrial covers. Transport note: a tarp is a cover; it should not be treated as a substitute for any cargo-restraint system required for the load.
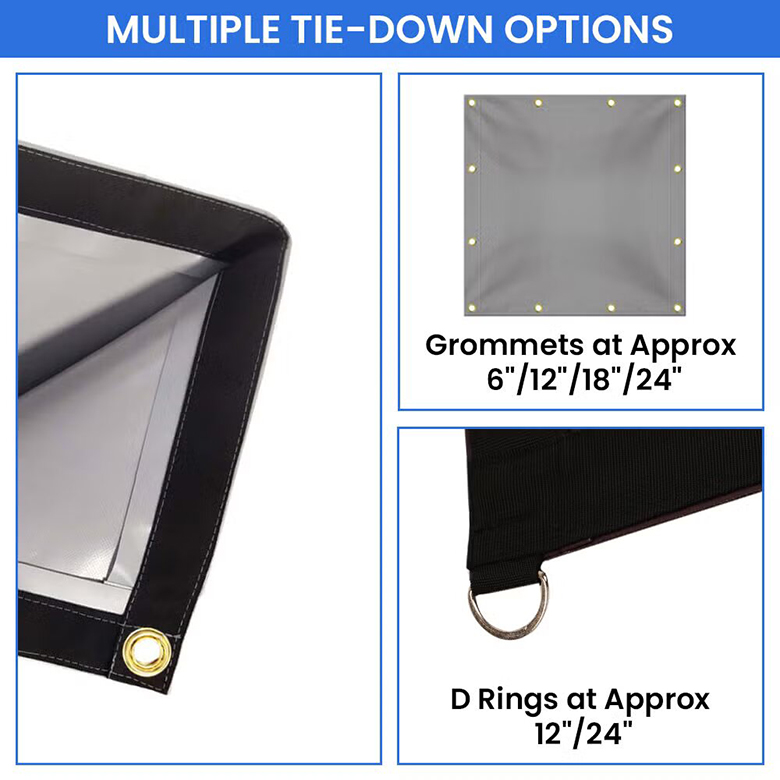
DERFLEX tie-down hardware reference: grommets and D-rings work best when the surrounding hem, webbing and corner reinforcement are designed for the actual pull direction.
What Is the Best Way to Tie Down a Tarp?
Center the tarp, protect sharp contact points, secure the corners first in diagonal pairs, add tie-downs along the edges, then tension gradually and evenly until the cover is controlled without overloading any one grommet. Keep enough slope for water runoff and use a small amount of controlled elasticity where gusts or vibration are expected.
The goal is not to make the tarp “drum tight.” The goal is to stop uncontrolled flapping, stop wind from getting underneath, prevent rain pooling, and distribute pull into reinforced hems, webbing, D-rings or other suitable fastening zones.
Fast Tie-Down Checklist
- Use a tarp sized closely to the object or frame.
- Pad sharp edges before the tarp is tensioned.
- Start with corners; tension opposite corners in pairs.
- Add intermediate ties instead of relying on four corners.
- Pull in line with the grommet, D-ring or webbing tab.
- Create a crown, ridge or slope so water cannot pool.
- Inspect the first few minutes after wind or vehicle movement begins.
How to Secure a Tarp in 7 Steps
This sequence works for many equipment covers, storage tarps, temporary weather covers and framed installations. The exact hardware and anchor strength should always match the application.
Inspect the Tarp and Anchors
Check torn hems, loose grommets, damaged D-rings, weak rope, worn bungees and unstable anchor points before applying tension.
Center the Tarp
Position the cover so overhang and side drop are balanced. Too much loose material creates flapping; too little overlap can expose the load.
Protect Sharp Edges
Add edge protectors, pads or wear patches where the tarp touches corners, rails, brackets or cargo that could cut or abrade the coating.
Set the Corners First
Attach the four corners lightly. Work in diagonal pairs so the tarp remains centered instead of being dragged toward one side.
Add Mid-Edge Tie-Downs
Use the practical reinforced points along each edge. Intermediate ties reduce unsupported spans and help stop wind from pumping the cover.
Tension in Stages
Make two or three passes around the tarp. Increase tension gradually rather than fully tightening one corner before the others are set.
Check Drainage and Movement
Create a slope or ridge, remove water-catching depressions, then watch the tarp under real wind or initial movement and retension if necessary.
Recommended Tension Sequence
A balanced sequence reduces diagonal distortion and prevents one corner or eyelet from taking the full load while the rest of the tarp is still loose.
Why tarp size matters before you tie anything down
An oversized tarp leaves large unsupported pockets; an undersized tarp forces tie-downs to pull at steep angles. Measure the real coverage path, side drops and anchor reach before choosing the finished dimensions. DERFLEX’s tarp size guide explains finished-size measurement for flat covers, equipment and truck-style applications.
Rope, Bungees, Ratchet Straps or Tarp Clips?
No single connector is best for every tarp. Choose the tie-down by movement, required adjustment, anchor type, wind exposure and the strength of the tarp’s reinforced attachment point.
| Method | Best Use | Main Advantage | Watch For |
|---|---|---|---|
| Rope / Cordage | Shelters, equipment covers, general outdoor securing | Flexible routing and knot-based adjustment | Use rope suited to the load; avoid thin cord cutting into tarp edges or hardware. |
| Ball Bungees / Shock Cord | Framed panels, canopies, repeated installation | Adds controlled elasticity that can absorb short gusts | Elastic parts age and lose strength; inspect for cracks, UV damage and overstretching. |
| Rubber Tarp Straps | Truck and trailer tarp systems where compatible | Quick tensioning with some movement absorption | Hooks and rubber can cause injury if released under tension; use the correct rated product and safe handling method. |
| Ratchet Straps | Defined D-ring or frame connections, controlled industrial tension | Strong, adjustable and repeatable tension | Easy to over-tighten and damage grommets or hems. Connect through reinforced zones designed for the load. |
| Tarp Clips / Grippers | Temporary extra tie points where suitable | Adds a connection without installing a new eyelet | Grip performance varies by clip and fabric; do not assume a clip has the same capacity as a designed reinforced point. |
| Integrated D-Rings / Webbing | Repeated industrial, equipment and transport covers | Can transfer pull through a larger reinforced area | Ring orientation, webbing overlap and backing patch must match the pull direction. |
Grommets are only as strong as the edge around them
A metal eyelet concentrates force into a small zone. Hem layers, webbing, washers, corner patches and aligned pull determine whether the fixing point survives repeated tension. For higher-load or directional attachments, review a custom tarp with D-rings and compare how the load is transferred into the perimeter.
Do not force the connector to pull sideways
If an anchor is far away from the hardware point, the rope or strap may pull across the edge rather than outward from it. Reposition the anchor, use a different tie point, or redesign the hardware map instead of twisting the grommet or D-ring.
Useful Knots for Tarp Tie-Downs
The “best” knot depends on whether you need a fixed loop, adjustable tension or a temporary attachment. Use knots you can tie correctly and inspect under load; rated straps or engineered hardware may be more appropriate for demanding commercial applications.
Trucker’s Hitch
Good for: creating adjustable mechanical advantage in rope lines. Useful when you need to tension a tarp line and then lock it off.
Bowline
Good for: making a fixed loop that does not intentionally tighten around the anchor. Useful at a post, ring or stable attachment point.
Taut-Line Hitch
Good for: adjustable guy lines in lower-load shelter and camping-type setups. It can be retensioned without untying the whole line.
Clove Hitch
Good for: quick temporary attachment around a pole or rail. It may need a backup depending on movement and direction of pull.
Two Half Hitches
Good for: a simple finishing knot after wrapping around a suitable anchor. Easy to inspect and widely understood.
Fixed Webbing / Buckle System
Good for: repeat covers where field knots create inconsistency. Straps, buckles and sewn/welded tabs can make the setup easier to reproduce.
Match the Anchor to the Surface and Pull Direction
A strong tarp and strong rope still fail if the anchor shifts. The anchor system should resist the expected direction of pull without creating a sharp edge or unstable connection.
| Surface / Application | Possible Anchor Direction | Practical Tie-Down Note |
|---|---|---|
| Soil / campsite / temporary ground cover | Properly selected stakes or ground anchors | Angle and depth depend on soil. Soft or wet ground may need larger or different anchors than firm ground. |
| Truck / trailer | Vehicle-approved rails, hooks or anchor points | Keep tarp tension separate from the rated cargo securement system. Avoid attachment points that can bend, cut the strap or interfere with vehicle operation. |
| Equipment / machinery | Stable frame members or designed brackets | Pad sharp corners and keep lines away from hot surfaces, moving parts, exhaust and service access. |
| Building frame / temporary enclosure | Engineered frame points, poles or approved fixings | Large exposed panels can create significant wind load. Site-specific engineering may be needed for permanent or high-risk installations. |
| Flat ground / no fixed anchors | Ballast or weighted systems where appropriate | Use a method that cannot roll, slide or tip. Do not use loose objects that can become hazards in wind. |
Commercial vehicle safety: covering and cargo restraint are different jobs
For road transport, secure the cargo using the applicable vehicle, load and jurisdiction requirements. The tarp should then be secured so it cannot tear, billow or interfere with mirrors, lights or vehicle operation. Do not count an ordinary cover as the sole method of preventing cargo movement.
How to Keep a Tarp from Flapping, Lifting or Pooling Water
Wind damage often begins with movement: a loose edge starts flapping, the load becomes cyclic, one tie point carries more force, and the surrounding fabric or hardware begins to fail.
Reduce Wind Entry
- Keep the windward edge low and controlled where the installation allows.
- Remove unnecessary loose overhang.
- Use intermediate tie points rather than four-corner anchoring alone.
Spread the Load
- Tension opposite points in stages.
- Align ropes and straps with the reinforcement.
- Use reinforced hems, webbing or corner patches where repeated pulling is expected.
Control Rainwater
- Create a ridge, crown or slope.
- Avoid broad horizontal unsupported spans.
- Inspect after rainfall because pooled water adds weight and can change tension dramatically.
High-wind rule: do not rely on a universal mph number
Safe performance depends on tarp area, orientation, anchor capacity, edge reinforcement, sheltering, gusts and the consequences of failure. If severe weather is expected, reduce exposed area or remove the temporary tarp when it is safe and practical to do so. Do not climb onto roofs or exposed structures during dangerous wind conditions.
How Tight Should a Tarp Be?
A tarp should be tight enough to control flapping and maintain shape, but not so tight that the grommets, webbing, seams or corners are permanently distorted. The exact tension depends on material elasticity, tarp size, anchor spacing and service conditions.
Signs the tarp is too loose
- Edges snap or flutter repeatedly.
- Wind lifts large sections between anchors.
- Water pockets form after rain.
- The tarp rubs back and forth on sharp contact points.
Signs the tarp is over-tightened
- Grommets visibly elongate the surrounding fabric.
- D-ring tabs twist away from their intended pull direction.
- Corners curl or seam lines distort.
- Ratchet straps are compressing the load or cutting into the tarp edge.
If edge stress is a recurring problem, compare the fastening layout with DERFLEX reinforced-edge tarp construction, where hems, webbing, corners and hardware are treated as a single load-transfer system.
8 Common Tarp Tie-Down Mistakes
Most tie-down failures are installation problems, fit problems or reinforcement problems before they become fabric problems.
Only tying the four corners
Large unsupported edges can flap, lift and transfer cyclic load into the corner eyelets.
Fully tightening one side first
The tarp shifts off center and the opposite hardware is forced to work at poor angles.
Pulling sideways through a grommet
Side-loading can deform the eyelet and cut into the reinforced edge instead of pulling in line.
Using damaged elastic ties
Cracked bungees or worn straps can release suddenly and may create a strike hazard.
Ignoring sharp edges
Repeated rubbing at a rail, corner or machine bracket can cut a tarp even when the center panel looks strong.
Letting rainwater pool
Water adds weight, stretches the cover and changes the load carried by every tie point.
Using a tarp as cargo restraint
A cover is not automatically a rated tiedown system. Cargo must be independently restrained where required.
Re-tying a torn grommet zone
Moving the rope to the damaged hole without rebuilding the edge usually concentrates stress in already weakened material. See DERFLEX’s tarp repair guide for structural edge damage.
How the Tie-Down Method Changes by Application
| Application | Priority | Good Practice | Extra Caution |
|---|---|---|---|
| Outdoor storage / equipment | Rain runoff + low flapping | Balanced corners, intermediate edge ties, padded contact points, sloped top | Do not tie to unstable furniture, loose blocks or components not designed as anchors. |
| Temporary roof / weather protection | Water shedding + perimeter control | Keep the sheet low-profile, create drainage and use multiple secure edge points | Roof work involves fall and weather hazards; use qualified installation methods and do not work in dangerous wind. |
| Camping / shelter tarp | Adjustability + drainage | Use a ridgeline or sloped pitch, adjustable guy lines and suitable stakes for the soil | Keep lines visible and away from walk paths; inspect after wind or rain changes. |
| Truck / trailer cover | Flap control + hardware alignment | Use the designed rail/hook system, reinforced tarp points and a repeat tension pattern | Cargo securement requirements are separate. For finished vehicle cover options, see DERFLEX truck tarpaulin solutions. |
| Construction / enclosure | Large-area wind control | Map frame bays, tie points, openings and reinforced perimeter zones before fabrication | Large sheets can create significant wind loads; site engineering may be required. |
Tie-Down Hardware, Reinforced Edges and Tarp Manufacturing
These are real DERFLEX site images selected for this guide. The hero image loads immediately; gallery images below use lazy loading.
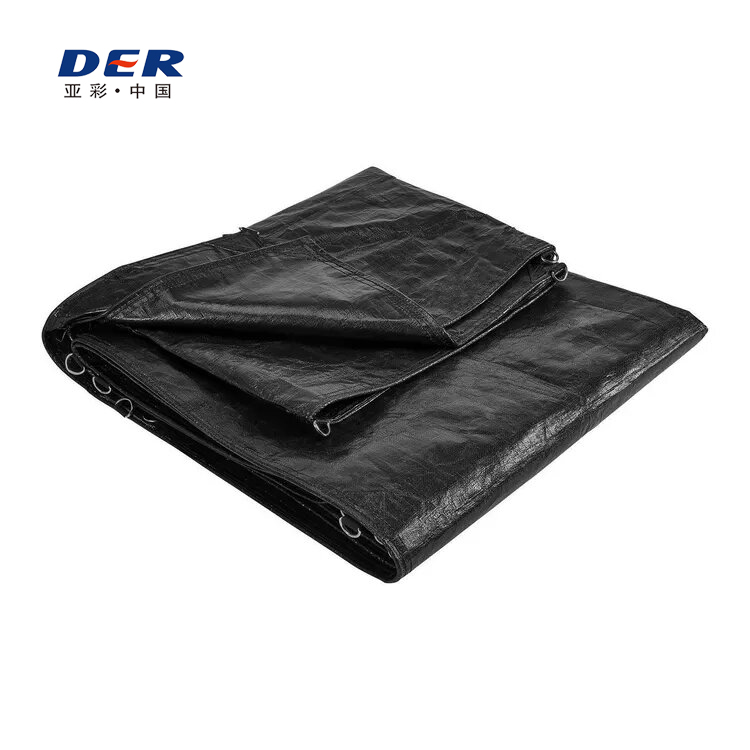
D-Ring Tie-Down Points
Defined attachment rings can work with hooks, webbing straps or buckles when the ring tabs and backing zones are designed for the pull direction.
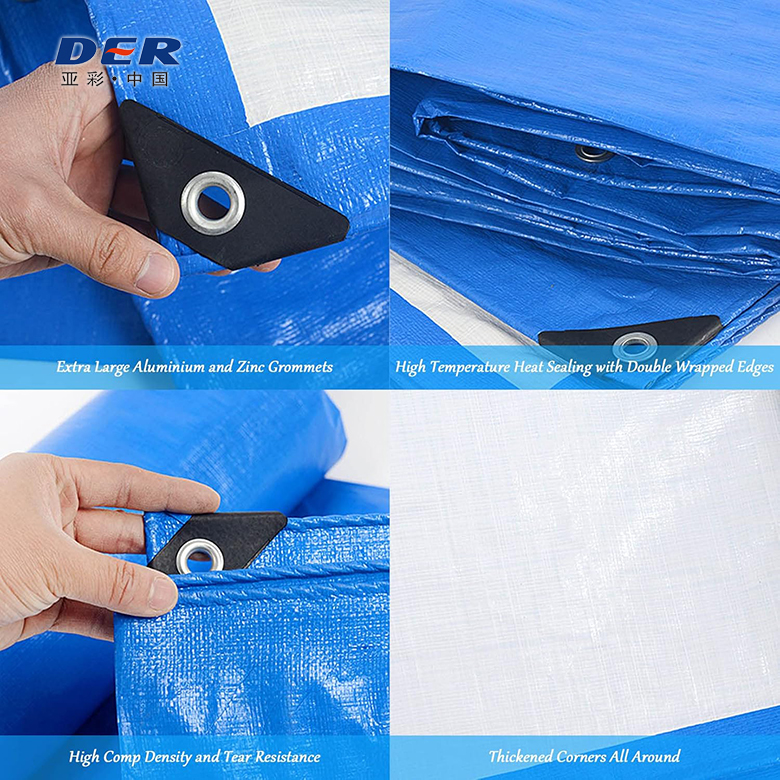
Reinforced Corner & Grommet Detail
Corner patches and reinforced hems help spread tension beyond the small metal eyelet and into a wider section of the tarp.
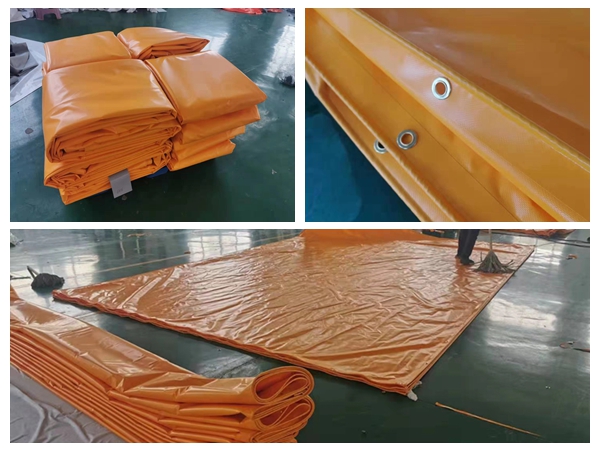
Finished PVC Tarps with Grommets
For repeated installation, hardware position, edge reinforcement and finished size should be locked into the production drawing rather than treated as an afterthought.
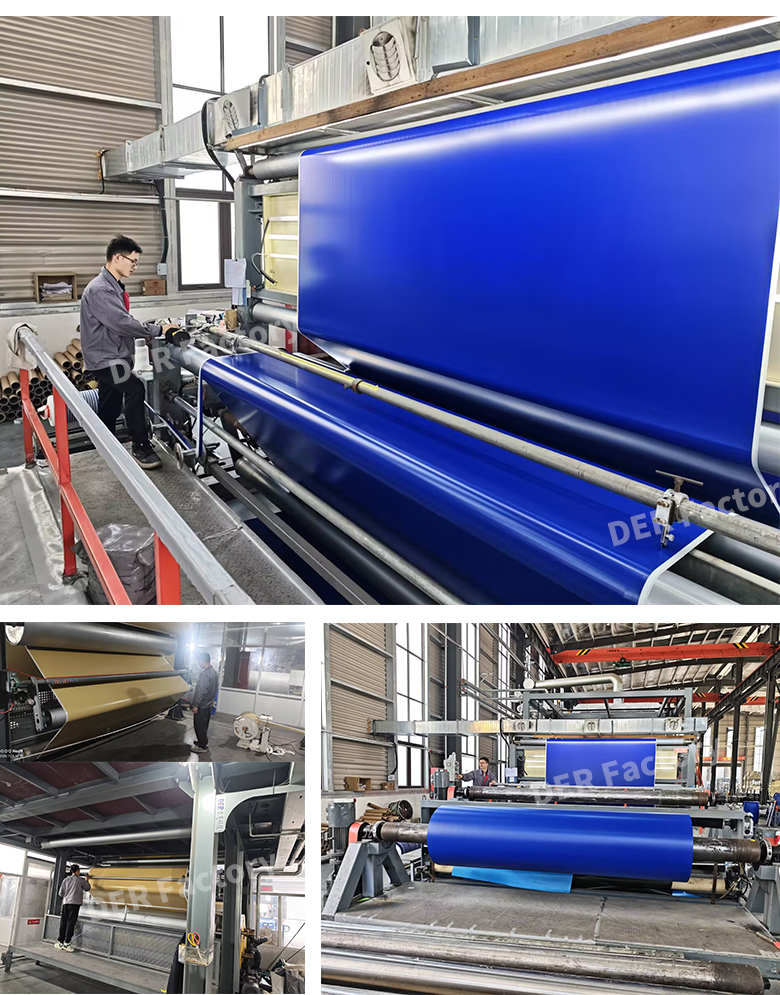
Coated Fabric Manufacturing Reference
Material construction and finished-tarp engineering need to work together when the cover will be welded, reinforced and repeatedly tensioned.
What to Specify When the Tarp Will Be Tied Down Repeatedly
For a custom tarp program, the tie-down system should be defined before production. A heavier fabric does not automatically fix a weak edge layout.
For repeat OEM or industrial supply, DERFLEX can review the fastening system together with material, finished size and reinforcement. See custom heavy duty tarps for made-to-order cover construction and hardware options.
Continue the Tarp Selection Process
Frequently Asked Questions About Tarp Tie-Downs
Short, direct answers are provided first so buyers and search systems can quickly understand the practical decision.
What is the best way to tie down a tarp?
Secure the corners first in diagonal pairs, add intermediate ties along every practical reinforced edge, then tension in stages. Keep the tarp centered, control loose fabric and create a slope so rainwater cannot pool.
Should a tarp be tight or loose?
A tarp should be controlled and evenly tensioned, not left loose and not over-tightened. Too much slack causes flapping and water pockets; too much tension can distort grommets, seams, D-rings and corners.
What knot is best for tying down a tarp?
A trucker’s hitch is useful when you need adjustable rope tension; a bowline creates a fixed loop; a taut-line hitch is useful for adjustable guy lines. The correct knot depends on rope type, load and application, and rated straps or hardware may be better for commercial work.
How do you stop a tarp from flapping in the wind?
Reduce loose overhang, secure the windward edge, use more practical tie points instead of only the corners, maintain balanced tension and add controlled elasticity where suitable. Flapping usually indicates an unsupported edge, poor fit or uneven tension.
How far apart should tarp tie-down points be?
There is no universal spacing. Use the tarp’s available reinforced points and the real anchor layout. When designing a custom grommet tarp, approximately 12–24 inches (300–600 mm) is a common discussion range for many products, but large exposed panels or higher loads may require a different layout and stronger reinforcement.
Can I use bungee cords through tarp grommets?
Yes, when the bungee, hook and grommet are suitable for the application. Elasticity can absorb short movements, but aged or overstretched bungees can fail. Inspect them regularly and do not use a small unsupported eyelet for, a load it was not designed to carry.
How do you tie down a tarp without grommets?
Use purpose-made tarp clips, webbing loops, pockets, sleeves or another attachment method compatible with the material. Avoid punching improvised holes in an unreinforced edge because the cut fabric can tear quickly under tension.
How do you stop water from pooling on a tarp?
Create a ridge, crown or continuous slope, reduce unsupported horizontal spans and retension the cover after installation. A flat depression can collect large amounts of water and overload the tarp, frame and tie points.
Is a tarp enough to secure cargo on a truck or trailer?
No. A tarp primarily covers and contains the load. Cargo should be immobilized or restrained using the applicable rated securement system and legal requirements for the vehicle and cargo. The tarp itself should also be secured so it cannot billow, tear or obstruct vehicle operation.
Can DERFLEX make a tarp with custom tie-down points?
Yes. DERFLEX can discuss custom finished dimensions, grommet positions, D-ring rows, webbing, reinforced corners, straps, pockets, material direction, color, printing and packaging according to the buyer’s drawing, application and quantity.
Build the Tie-Down System Into the Tarp
For repeat B2B use, do not leave grommet spacing, D-ring position and reinforcement until the end. Send DERFLEX the finished dimensions, application, anchor locations, expected pull direction, material target, quantity and destination so the team can review a practical custom specification.
Useful RFQ Information
- Finished size or drawing
- Application and weather exposure
- Anchor positions and pull direction
- Grommet / D-ring / strap layout
- Hem, webbing and corner reinforcement
- Quantity, branding, packing and destination
Guidance on this page is general. Anchor capacity, tie-down strength, wind loading, vehicle regulations and safe installation methods vary by application. Final commercial tarp specifications should be confirmed against the actual installation and approved sample.