


Movable grip. Fixed connection. Different decisions.
Tarp Clips vs Grommets: Which Attachment Fits Your Application?
Choose tarp clips when tie-down points need to move or you want to avoid punching new holes. Choose factory-set grommets when a reinforced cover needs fixed attachment positions that match a known frame or anchor layout.
For equipment covers, outdoor storage, temporary shelters and repeated installation, the useful comparison is the complete attachment on your actual tarp. Clip jaws, coated fabric, hem thickness, grommet reinforcement and pull direction all affect the result. DERFLEX can discuss PVC coated polyester tarp specifications, finished dimensions, reinforced edges and attachment layouts for project and OEM orders.
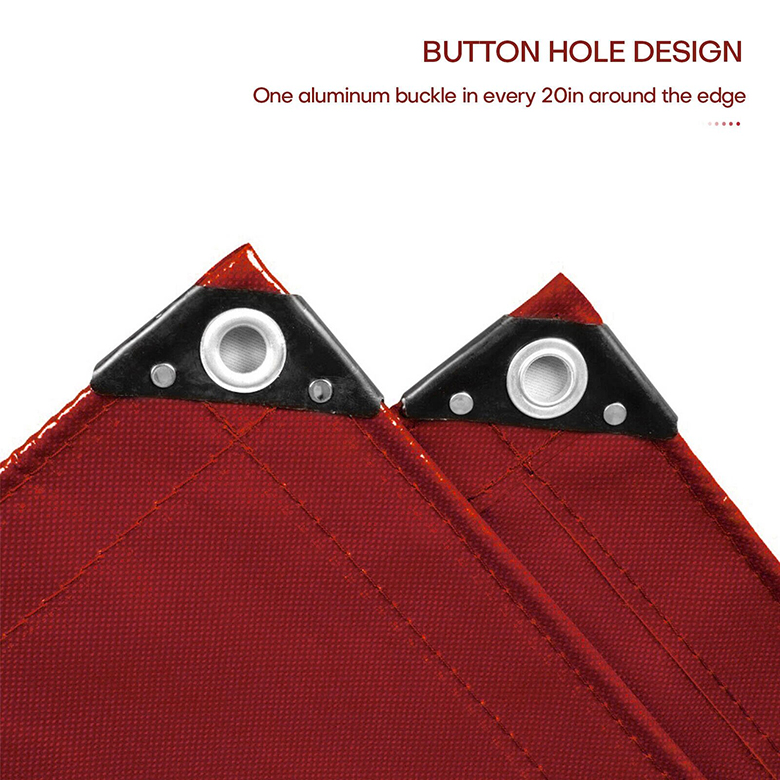
What is the difference between tarp clips and grommets?
A tarp clip, tarp clamp or tarp gripper holds the sheet between gripping parts and provides a connection for a tie. A grommet is a fixed ring installed through a prepared opening, normally in a reinforced edge. “Eyelet” is also commonly used for this tarp hardware; specify the actual component rather than relying on the name.
| Selection factor | Tarp clips / clamps | Reinforced grommets / eyelets |
|---|---|---|
| How the load enters | Through jaw contact, friction or the clip’s locking geometry into the gripped fabric. | Through the ring and washer into the surrounding hem, patch or webbing. |
| Hole in the tarp | Usually no punched hole; grip pressure can still mark or damage a surface. | Requires an opening. Its position must be coordinated with reinforcement and weather protection. |
| Position adjustment | Reusable designs can be moved to suitable sound material within their installation limits. | The factory-set position is fixed; changing it requires a new qualified attachment zone. |
| Compatibility check | Jaw opening, layer thickness, texture, coating, edge shape and locking method. | Barrel length, washer profile, hole preparation, backing thickness and connector fit. |
| Repeated installation | Requires consistent placement and grip engagement after each relocation. | Provides identifiable fixed points; repeated contact can wear the ring, tie or surrounding material. |
| Typical failure to inspect | Slippage, fabric damage at the jaws, loss of lock engagement or clip breakage. | Pull-through, edge tearing, loose setting, washer distortion or connector abrasion. |
| Weather sealing | Avoids a new penetration, but does not seal seams, overlaps or the cover perimeter. | The opening is not a watertight seal. Keep it outside the required sealing area or specify another detail. |
| Purchasing cost | Include separate clips, fitting time, inspections and replacement stock. | Include reinforcement, hardware setting, layout control and eventual edge repairs. |
On small screens, scroll the table horizontally.
Metal choice is a separate decision. Use the tarp hardware material guide to discuss exposure and corrosion requirements after selecting the attachment architecture.
Which attachment fits your application?
Start with the anchor map and how often the cover moves. The directions below are specification starting points, not load ratings. A validated clip can be appropriate for demanding work; a poorly reinforced grommet can fail in ordinary use.
| Application | Starting direction | Why it fits | Check before approval |
|---|---|---|---|
| Temporary indoor cover or repositioned divider | Compatible removable clips where tie positions change. | The installer can adjust fixing locations without adding holes. | Grip on the actual material and hem; any required fire performance for the finished installation. |
| Stationary equipment cover used on the same frame | Factory-set reinforced grommets, with identified positions. | A fixed layout can reduce placement uncertainty during each installation. | Anchor alignment, connector clearance, corner pull and access for removal. |
| Outdoor storage with varying anchor positions | Planned primary attachments plus qualified supplementary clips where useful. | A mixed system can accommodate site variation without redrilling the edge. | Load sharing, wind exposure, drainage, clip retention and inspection access. |
| Truck or trailer cover | A vehicle-appropriate attachment layout; consider reinforced grommets, D-rings or straps. | Transport involves vibration, airflow and repeated handling beyond a stationary cover. | System instructions, moving clearance and cyclic retention. Secure cargo separately from the weather cover. |
| Shelter or canopy with a defined rain boundary | Keep fixings outside the required sealing area; assess clips or purpose-built tabs. | Attachment placement affects both tension and where water can enter. | Frame design, runoff, uplift and the entire installation’s service requirements. |
| Temporary recovery after an eyelet tears out | A compatible clip on sound material beyond the damaged zone, if the remaining cover is suitable. | It may restore a temporary connection while a proper repair is arranged. | The tear’s extent and cause. Do not grip a frayed hole or assume original capacity has been restored. |
Outdoor retention also depends on cover fit and movement. Read how to control tarp flapping when selecting the fixing layout.
Will tarp clips work on your fabric?
Check the material where the jaws will close. A folded hem, rope edge or corner patch can be much thicker than the center sheet. GSM describes mass per area; it does not establish clip fit or attachment capacity.
| Material / edge | For a clip trial | For a grommet specification |
|---|---|---|
| PVC coated polyester / vinyl tarp | Measure the finished grip zone. Check surface marking, slippage and behavior after sustained tension. | Define the hem or backing structure and verify how force reaches the polyester reinforcement. |
| Woven PE tarp with laminated faces | Check whether the jaws damage the face or distort the woven substrate. Repeat removal and reinstallation on a sample. | Inspect the finished hem and eyelet zone; a thick-looking sheet alone is insufficient evidence. |
| Canvas or other woven textile | Confirm grip with the actual finish and relevant dry or wet condition; inspect yarn damage. | Match hardware and backing to the cloth, edge construction and intended connector. |
| Clear film without woven reinforcement | Inspect for stretching, jaw impressions and tear initiation. Avoid transferring a woven-tarp claim to film. | Develop a reinforced attachment detail or alternative perimeter system before punching holes. |
| Mesh, rope hem or bulky folded edge | Check mesh capture and the clip’s allowed thickness and edge profile. Do not force an incompatible clip closed. | Coordinate the hardware with the actual mesh reinforcement or rope position. |
Specify the contact zone, not just the accessory
Two tarps with the same center material can need different attachments. Give the fabricator an edge drawing, an anchor layout and the intended pull directions before choosing a fixing pattern.
Choose a locking method that fits the edge
- Screw-adjusted jaws: confirm allowable thickness, tightening instructions and whether the teeth mark the coating.
- Wedge-lock grippers: follow the required engagement and pull direction; do not assume all wedge designs behave alike.
- Snap or cam designs: check positive closure and the edge profile needed to retain the material.
- All clip types: record contact position, gripped layers, connector and clearance from seams or folds.
Relocation needs a repeatable method
Mark approved zones when useful. Set the clip on clean, sound material, engage it as instructed, tension progressively and inspect for movement. Release tension before removal.
Build the backing before setting the ring
- Define finished edge width, material layers and any continuous webbing or local patch.
- Match the grommet barrel and washer to the assembled thickness.
- Set hole positions from an agreed drawing, including corner offsets and connector access.
- Specify setting quality: secure seating, suitable clearance and no cutting or distortion around the opening.
Spacing follows the anchor layout
Closer spacing does not automatically create equal load sharing. Include how each point will connect and tension in service. Use the corner and grommet reinforcement guide for backing details.
How to compare attachment strength fairly
Request a sample comparison of the intended clip installation and the production-style grommet zone. A new clip on flat sheet and an eyelet in a reinforced hem are different assemblies; document that difference instead of presenting the results as universal hardware ratings.
Freeze the construction
Identify fabric, coating, layers, edge detail, clip model and grommet assembly. Keep sample IDs and photos.
Match the loading
Agree on connector, specimen restraint, pull angle, rate and sample conditioning before comparing results.
Define acceptance
Set the allowed movement or damage, retention requirement and number of samples. Separate initial slip from ultimate failure.
Check repeated use
Add relocation, cyclic pull, wet exposure or temperature conditioning when these represent the actual application.
For a detailed method discussion, see finished grommet pull-out testing. The buyer and supplier should agree on acceptance values for the specific project.
What should you change when an attachment fails?
Record the first visible change. Increasing tension or installing a larger ring may leave the original problem unresolved. This inspection map helps focus the next sample revision.
| Observed symptom | Inspect first | Next specification review |
|---|---|---|
| Clip moves but fabric stays intact | Lock engagement, layer thickness, surface contamination and pull alignment. | Confirm model compatibility and installation; trial another grip or edge detail. |
| Jaw marks become a tear | Tooth contact, local folds, coating damage and whether the clip is gripping weakened material. | Change contact geometry or attachment architecture; validate a fresh sample. |
| Eyelet comes out with torn fabric | The extent of the backing zone and the path of force into the surrounding material. | Review reinforcement, position and pull direction before changing metal alone. |
| Both types fail at the same corner | Anchor geometry, diagonal tension, unsupported fabric and local abrasion. | Review the corner and installation together, then repeat the representative trial. |
| New samples hold; used covers fail | Wear, repeated fitting, environmental exposure, damaged connectors and uneven tension. | Extend qualification to used or conditioned assemblies and define inspection criteria. |
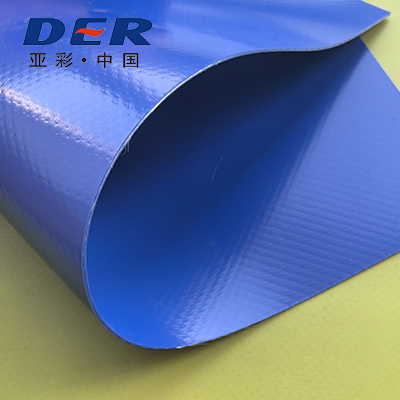
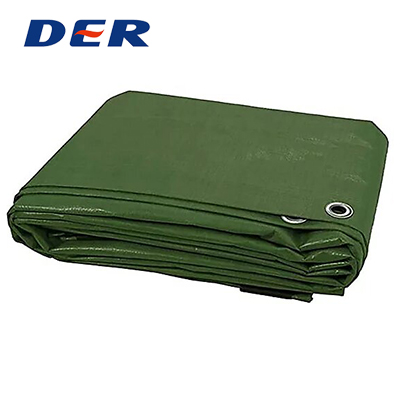
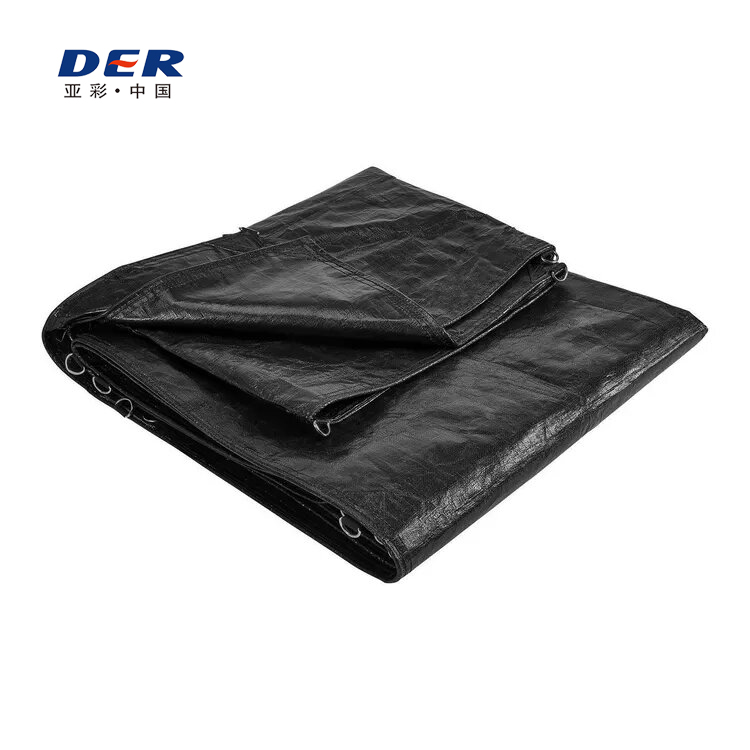
Look at the material and finished edge together
The grip surface, layered hem and attachment zone deserve separate checks. These DERFLEX product photographs show coated fabric and finished covers; they do not demonstrate the performance of a particular clip.
Compare the installed cost of the tarp system
The accessory price is only one line in the purchasing decision. Include fitting labor, inspection time, replacement parts, edge repair and the cost of an unsuitable cover.
For a changing site layout
Clips may reduce the need to add new permanent holes when anchor positions vary. Include how installers will identify suitable grip zones and keep the same fitting quality across locations.
For bulk purchasing, request an identified model, installation instructions, compatibility evidence and replacement availability. Confirm separately whether DERFLEX is supplying clips or only the compatible tarp.
For a repeated OEM cover design
Factory-set grommets may simplify repeat fitting when each cover uses the same anchor map. Include edge construction and positional tolerances in the approved drawing, rather than only a grommet count.
DERFLEX’s custom tarp manufacturing options cover material and finished-cover specifications, including reinforcement and hardware layouts.
Sample scope, MOQ, pricing and lead time depend on material, fabrication, quantity and accessory sourcing. Confirm these for the approved specification.
What should you send DERFLEX for a quotation?
A marked sketch or installation photo is often more useful than “heavy duty clips” or “strong eyelets.” Show where the force enters the cover and whether those positions will change.
- Application: stationary cover, shelter, divider, storage or transport.
- Finished dimensions: shape, overlaps, open sides and anchor sketch.
- Material: PVC coated polyester or another specified sheet; GSM/thickness if known.
- Edge construction: hem, webbing, patches, rope or other reinforcement.
- Attachments: fixed positions, relocatable zones, connectors and any nominated clip model.
- Service conditions: outdoor duration, movement, abrasion, temperature and relevant UV/FR requirements.
- Order details: quantity, color, logo, packaging and destination.
- Approval requirements: sample assembly, agreed retention checks and layout tolerances.
Copy the details into the DERFLEX quote form, or open an email draft and attach your drawing.
Tarp attachment questions
Direct answers for buyers comparing tarp clamps, grippers, eyelets and reinforced fixing points.
Can tarp clips replace grommets?
Yes, when the chosen clip is compatible with the actual fabric and edge and meets the application’s retention requirements. They are useful for movable or additional fixing points. Replacement still requires checking grip, pull direction and service conditions; it is not automatic equivalence.
Are tarp clips stronger than grommets?
There is no universal ranking. A clip depends on its design and the material it grips. A grommet depends on the hardware, setting and surrounding reinforcement. Compare representative assemblies under the same loading and conditioning, and record both movement and damage.
Do tarp clips damage PVC or vinyl tarps?
They can. A clip usually avoids a punched hole, but concentrated jaw pressure, teeth, poor fit or repeated movement can mark the coating or damage the fabric. Follow the clip instructions and inspect a trial on the actual PVC tarp before approving bulk use.
Can I use a clip after a grommet tears out?
A compatible clip on sound material beyond the tear may provide a temporary connection if the remaining cover is suitable. Do not clamp the frayed opening. Investigate the cause and repair or redesign the attachment zone before returning the cover to its intended duty.
How far apart should tarp grommets be?
Spacing should match the cover dimensions, anchor positions, reinforcement and load-sharing plan. There is no universal interval for every cover. Approve the position drawing and verify that the intended connectors can engage the points without unwanted diagonal pull.
Can clips and grommets be used on the same tarp?
Yes. Planned grommets can provide repeatable primary positions while compatible clips add adjustable connections. Define each point’s role and avoid adding tension that overloads one local zone. Qualify the mixed layout on a representative cover or edge assembly.
Can DERFLEX manufacture custom tarps with reinforced attachment points?
DERFLEX can discuss PVC coated polyester material and custom finished tarps with reinforced hems, grommets, D-rings and other project-specific details. Send the anchor layout, dimensions, exposure and quantity. Confirm clip sourcing, sample scope, MOQ and lead time for your order.