


 COATED TEXTILES / TECHNICAL GUIDES
Spill Containment Liner Inspection, Repair & Retirement
A containment liner should return to service through a recorded decision: inspect the complete liquid-contact barrier, identify the exposure, assess whether the damage is repairable, then verify the approved repair. This guide helps mining and oilfield maintenance teams, spill-control brands and service providers document floor, corner, seam and fitting condition—and prepare a replacement specification when repair cannot be supported.
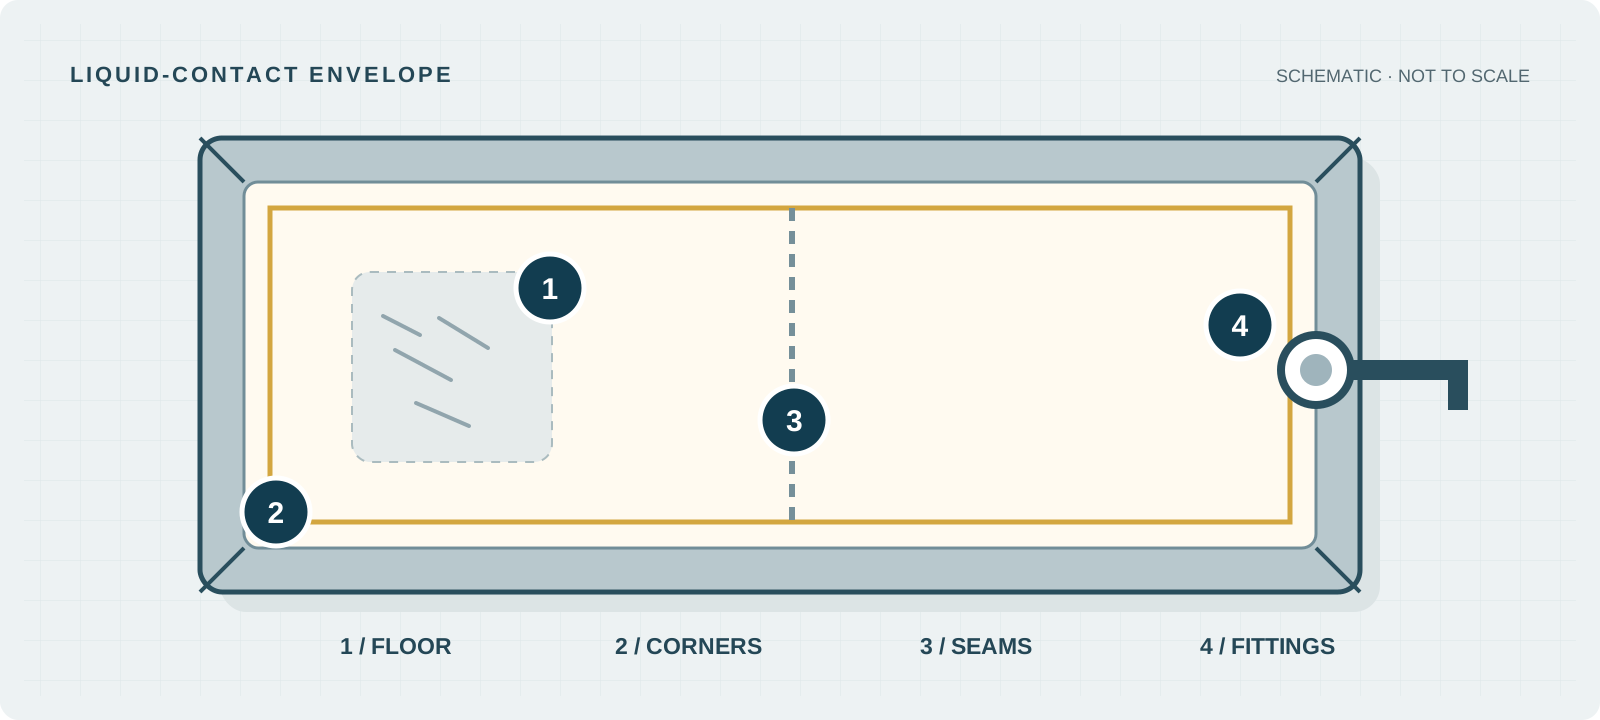
Can this containment liner be used again?
Keep a damaged or suspect liner out of service until its condition is assessed against the approved specification. A clean, localized mechanical defect may be repairable when the surrounding material is sound and the manufacturer’s procedure covers that location. Suspected chemical degradation, an unknown exposure or an unverified repair requires quarantine and a documented technical decision. Appearance, a temporary seal or a single leak check cannot establish the complete service capability.
Identify the construction first. The spill containment berm fabric guide explains why coating, reinforcement, welded joints and the finished basin require separate evidence.
Inspect floor, corners, seams and fittings before deployment
Match the liner label or asset number to its grade, drawing revision and permitted liquids. Check that the inspection record belongs to this liner rather than a similar unit. Review unresolved findings and previous repairs before unfolding or placing equipment.
Make the liner safe to handle using the site’s recovery and decontamination procedures. Do not crawl beneath loaded equipment or disturb contaminated components to obtain a photograph. Inspect in adequate light on a suitable surface, following the liner manufacturer’s handling limits.
On a small screen, scroll within the table to read all columns.
| When to inspect | Focus of the check | Record before the next step |
|---|---|---|
| Before deployment | Unfold on a suitable clean surface. Inspect both faces, floor, corners, seams and fittings; check support and ground protection. | Asset ID, drawing revision, inspector, date, location and baseline condition. |
| After use or relocation | Recover liquid safely, then look for new cuts, wheel-path wear, dragging damage and stressed attachments. | New damage mapped against the pre-use record; the operating event that preceded it. |
| After a spill or cleaning | Record the fluid and cleaner separately. Assess condition after the specified recovery, cleaning, drying and any required observation period. | Product/SDS reference, concentration, contact temperature, duration, cleanup and condition changes. |
| After repair, before release | Check the approved repair record, patch edges, nearby substrate, affected interfaces and specified verification results. | Repair ID, procedure revision, actual results, acceptance decision and authorized release. |
On a small screen, scroll within the table to read all columns.
| Inspection zone | What to examine | Evidence to capture |
|---|---|---|
| Floor & underside | Cuts, pinholes, concentrated loading marks, embedded grit, exposed scrim and abrasion hidden beneath wear pads. Inspect the reverse face when safe access allows. | Overall view and close-up with scale; side, orientation and relation to supports or wheel paths. |
| Corners & wall transitions | Crease cracking, stretched folds, layer steps, wall-to-floor welds and abrasion where supports contact the liner. | Corner identifier and photographs of the complete transition, including adjacent sound material. |
| Seams & previous patches | Opening edges, channels, lifting, discoloration changes and cracks at weld terminations. Do not force a tool into an installed seal unless its inspection procedure permits it. | Joint ID, both seam ends, patch perimeter and any change from the previous record. |
| Drains, sleeves & fittings | Gasket condition, flange contact, distortion, liner tearing, cap/valve closure and stress from unsupported pipework. | Fitting position, component reference and the complete supported connection, not only the visible valve. |
Drains need more than a check of the valve handle. See liner drain, sleeve and penetration details for the sealing interfaces and external support that must remain intact.
Record swelling, tackiness, delamination and abrasion
Describe what changed before naming a cause. A stain may be residue; softening may indicate a coating change. Compare with the earlier condition record or an identifiable unexposed reference where available. An unexposed sample helps comparison but does not certify the installed liner.
On a small screen, scroll within the table to read all columns.
| Observed change | How to describe it | Disposition for review |
|---|---|---|
| Swelling or distortion | Map raised or enlarged areas; record exposure conditions and dimensional comparisons only with a defined baseline and method. | Hold out of service pending material and exposure review; a patch cannot restore degraded surrounding coating. |
| Tackiness or softening | Note where residue or sticking occurs and whether the observation persists after an approved cleaning/drying process. Do not use bare-hand contact with unknown contamination. | Investigate residue versus coating change. A clean appearance alone does not close the finding. |
| Blistering or delamination | Record lifted coating, bubbles or separation from the reinforcement, including changes beyond the visibly affected spot. | Quarantine for technical assessment. Avoid spreading damage by peeling the installed liner for an informal test. |
| Abrasion, cuts or exposed scrim | Map the worn area, any through-hole, fraying and relation to contact points. Inspect the opposite face. | A known, localized mechanical defect may enter repair assessment; exposed reinforcement requires evaluation of the barrier and load path. |
| Cracking or loss of flexibility | Describe fold-line cracks, brittle regions or stiff areas under the permitted inspection conditions. | Assess the extent and cause before bending or redeploying. A visual check cannot establish retained mechanical performance. |
Build a repeatable photo record
Take an overall view showing orientation, a mid-range view locating the defect, and a close-up with a scale. Mark the defect on a drawing copy using a compatible, approved identification method. Photograph both faces when accessible and label the image files with the asset and finding IDs.
Record the complete exposure sequence
List the exact service fluid, concentration or blend, temperature and contact duration. Add the cleaner, dilution, dwell, rinse and drying conditions. Record uncertainties rather than estimating missing contact time. Reinspect after any observation period specified by the applicable procedure.
Cleaning is another chemical exposure. The degreaser compatibility evaluation guide provides a framework for recording cleaning conditions; its cover guidance does not itself approve a cleaner for a liquid-retaining liner.
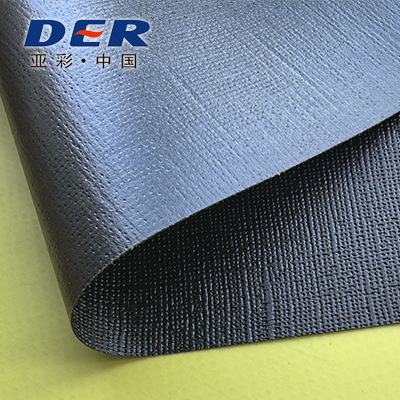
Know which surface you are inspecting
Actual DERFLEX coated-fabric reference showing opposite faces. Record which face contacts the liquid and which rests against the support. This sample is not a damaged liner, an approved repair patch or proof of chemical compatibility.
Separate clean repairable damage from chemical degradation
A repairable defect is a technical disposition, not a visual size category. A small hole in chemically affected fabric may be less repairable than a larger, clean mechanical cut in sound material. No universal hole size, patch count, percentage of wear or service age is assigned here.
Localized, understood mechanical damage
Identity and exposure are known; contamination has been addressed; the surrounding coating and reinforcement can be assessed; and an approved process covers the location, geometry and intended duty. Keep the liner on hold while that assessment and repair verification are completed.
Unknown history or suspected degradation
Use a hold status for persistent softening, swelling, delamination, unexplained cracks, uncertain grade or unknown chemicals. Protect the record and identify the asset so it cannot be redeployed accidentally. A patch over the visible spot does not resolve uncertain material condition.
Retire from the intended service when no acceptable release route remains. Examples include failure of the approved acceptance criteria, degradation outside the repair procedure’s scope, inability to establish a sound repair boundary, or contamination that cannot be managed for the intended handling and reuse. A technical hold is not automatically a disposal decision.
Repeated damage at the same location also calls for a system review: ground protection, load contact, folding, fitting support and operator access. The mining maintenance containment mat guide helps map the service zone and concentrated wear sources before ordering another liner.
Do not confuse emergency control with an accepted repair
Improvised tape, sealant or an absorbent placed over a leak does not qualify the liner for continued use. A proprietary adhesive or tape system requires specific written approval for the identified liner and exposure, plus its installation and verification requirements. Treat emergency measures under the site response plan; record them and reassess the liner before reuse.
Validate the repair process and return-to-service criteria
Use the written repair instructions for the exact liner construction and affected detail. If the method is not already qualified, obtain technical approval before field work. A patch material with a similar color, thickness or polymer name is not an interchangeable repair system.
Define the repair envelope
Confirm the damaged area, permitted repair zone, patch construction and orientation, surface preparation and joining method. Corners, drain collars and highly folded areas may require a specific detail or replacement. Patch overlap, shape and edge treatment belong in the approved procedure.
Control the actual process
Record patch batch, operator, equipment, preparation, environmental conditions and process settings required by the method. Follow specified cooling or curing conditions before handling or testing. Do not improvise heating, solvents, pressure or an adhesive recipe on a contaminated liner.
Where qualification requires mechanical or liquid-exposure evidence, use representative repair coupons and relevant corner or fitting assemblies. Link their materials and process to the field repair. Do not cut a test specimen from a service liner unless destructive sampling and the resulting disposition are explicitly authorized.
The spill tray seam testing guide after chemical exposure separates parent fabric, joined specimens and shaped assemblies. A strong coupon and a leak-free assembly answer different questions.
On a small screen, scroll within the table to read all columns.
| Gate | Required evidence | Who closes the gate |
|---|---|---|
| Material and exposure | Identifiable liner grade, exposure history, condition assessment and a documented basis for repairability. | The responsible material/liner technical authority. |
| Approved process | Matching repair system; written method and revision; operator, equipment, environmental limits and actual process record. | The repair provider and procedure owner. |
| Completed repair | Photographs, repair location/ID, patch material batch, edge/termination inspection and required mechanical evidence from representative samples. | The designated inspector or quality role. |
| Assembly verification | Specified leak/continuity or functional check, supported setup, medium, level/load, duration, results and pass/fail decision. | The finished-system authority or responsible site approver. |
| Release and follow-up | All findings closed; approved service envelope, any restrictions and next inspection trigger recorded. | The named person authorized to return the asset to service. |
A leak check has a defined scope. Specify the approved test medium, supported configuration, level or load, duration, observation method and acceptance criteria. Use safe recovery arrangements and do not exceed system limits. A water check does not prove chemical resistance or retained strength. Do not introduce compressed-air testing unless a purpose-designed, approved procedure requires it.
Release only after the specified results meet the agreed criteria and the authorized person signs the record. Record any restricted duty and the next inspection trigger. Cleaning, a visual check and a successful spot test cannot silently substitute for the required release evidence.
Use one record from discovery to final disposition
Give every finding an ID and carry it through the photos, repair instruction, verification results and release or retirement decision. Keep the original observation even if the liner looks normal after cleaning; the exposure history remains relevant to later assessment.
Inspection, repair and release record
The editable, printable HTML record includes asset identity, inspection triggers, zone findings, exposure history, repair traceability, verification conditions and authorization fields. It is a planning template; enter the project’s approved criteria and procedure references before using it to release a liner.
Keep retired units identifiable and separate from serviceable inventory. Record the retirement reason and replacement reference. Manage retained liquid, wash water and contaminated fabric through the site’s applicable waste procedure; this guide does not classify the waste or authorize disposal.
Order a replacement liner using the approved drawing
Begin with the latest approved drawing and its revision, then verify the actual supporting assembly. A stretched or chemically distorted liner is not a reliable dimensional master. If no approved drawing exists, have the responsible designer establish a controlled specification before manufacture.
Define fit and interfaces
- Finished internal floor dimensions, supported wall height, corner construction and manufacturing tolerances.
- Seam routes, coated-face orientation, folding zones, support pockets and wear protection.
- Drain, sleeve and flange positions measured from named datums; component IDs and gasket details.
- Installation clearance, wall supports, retention details and access for future inspection.
Define material and acceptance
- Approved grade and construction, batch traceability and any retained sample or previous order reference.
- Service liquids, cleaning sequence, contact conditions and required qualification evidence.
- Fabrication and finished-assembly checks, documentation, labels and agreed spare-material requirements.
- Quantity, packing, destination and required delivery plan, to be confirmed in the quotation.
For shallow basin and pallet configurations, use the flexible spill tray and pallet liner fabric guide to distinguish the liquid barrier from the separate load-bearing support.
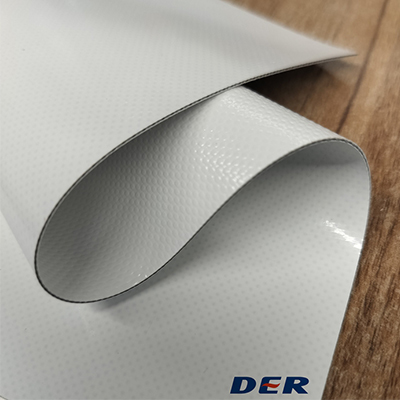
Confirm what the replacement quotation includes
DERFLEX supplies coated-fabric materials for OEM liner development. State whether the request concerns rolls, repair-material candidates for approval, or a fabricated replacement. Confirm conversion, fittings, installation and finished-system responsibility separately; the existing frame or pallet is not automatically included.
Repair versus replacement cost depends on approved labor, decontamination, verification, downtime and remaining service suitability—not simply patch area. A replacement can also require a revised support or wear detail if the original failure mechanism remains.
Containment liner inspection and repair FAQ
How often should a spill containment liner be inspected?
Inspect before deployment, after use or relocation, after a spill or cleaning, and after repair before release. Add scheduled in-service checks according to the manufacturer’s instructions, site procedure and exposure history. This guide sets no universal calendar interval.
Can a chemically damaged liner be patched?
Do not patch over suspected chemical degradation as a routine repair. Swelling, persistent tackiness, blistering or coating separation requires assessment of the affected area and surrounding material. Repair is a candidate only when the responsible technical authority confirms a sound substrate and an approved process for that exact liner and exposure.
Does repair tape make a leaking liner fit for service?
An improvised tape seal is not an accepted repair. A manufacturer-specific adhesive or tape system can be considered only when its written approval covers the identified liner, defect, liquid exposure and installation conditions, with the required verification and documented release. Emergency leak control does not itself authorize reuse.
Does passing a water check prove chemical resistance?
No. A defined water check may address leakage under its recorded conditions, but it does not establish compatibility with the service chemical, retained strength after exposure or long-term seam durability. The approved verification plan must address the intended duty separately.
When should a containment liner be retired?
Remove the liner from service when it fails its approved acceptance criteria, cannot be decontaminated for the intended handling, or cannot be repaired and verified by an approved process. Uncertain identity or exposure calls for quarantine and review. Neither age nor a universal patch count is a sufficient standalone rule.
What should I send DERFLEX for replacement planning?
Send liner identification, the latest approved drawing and revision, overall and close-up damage photos with a scale, exposure and cleaning history, fitting details, required quantity and destination. Identify whether you need fabric rolls, approved repair-material candidates or a fabricated replacement liner; supply scope requires confirmation.
Send liner identification, damage photos and exposure history.
Include the asset or material reference, drawing revision, service liquid and cleaner details, defect location, previous repair record and the replacement quantity if needed. Describe the decision you need: material identification, repair-material review or replacement planning.
Attach the supporting files through your established sales correspondence and include the reference in the quote request. Do not send a contaminated physical sample before receiving handling and shipping instructions.